

Installation
How to Splice Fiber Optic Cable: Fusion & Mechanical
If you need to join two fiber optic cables — whether you are repairing a trunk cut by a backhoe or extending a run past the end of the reel — you have two proven ways to do it: fusion splicing and mechanical splicing. Fusion welds the glass ends together with an electric arc and produces the lowest possible loss; mechanical splicing holds the two ends in precise alignment inside a small housing. Both follow the same preparation discipline — strip, clean, cleave — and both are judged by the same number: splice loss. This guide walks you through both methods step by step, gives you the loss limits to accept or reject a splice, and covers the mistakes that cause high-loss splices so you can fix them on the first visit instead of the second.
Fusion vs. Mechanical Splicing: How to Choose the Right Method
The choice between fusion and mechanical splicing comes down to four things: acceptable loss, equipment budget, speed, and whether the joint is permanent. Here is the decision at a glance.
Factor | Fusion splicing | Mechanical splicing |
|---|---|---|
Typical splice loss | 0.02–0.05 dB (max ~0.1 dB) | 0.2–0.5 dB (per housing spec) |
Equipment cost | High (fusion splicer, cleaver, oven) | Low (hand tools + splice housings) |
Time per splice | ~1–3 minutes after prep | ~1–2 minutes after prep |
Power needed | Yes (battery or mains) | No |
Joint type | Permanent, field-proven for 20+ years | Semi-permanent, gel degrades over time |
Best for | Backbones, OSP, any permanent link | Temporary repairs, indoor, low-count links, emergency restores |
Fusion splicing is the default for outside plant, backbone, and any link where a rework means another truck roll — the extra equipment cost pays for itself in loss performance and longevity. Mechanical splicing wins when you need a fast, power-free join: emergency restores, short indoor runs, or a small count of fibers where a fusion splicer is not justified. The Fiber Optic Association's OSP reference covers both methods from the standards side, and it is worth reading once before your first big splice day.
Two more options sit outside the splice-versus-splice choice: field-installable fast connectors and pre-terminated cable, both of which avoid splicing altogether — more on those in the last section. And a note on fiber type before you start: never plan to join single-mode to multimode fiber; the mode-field mismatch makes the splice loss unacceptable regardless of method. If you are unsure what your run carries, check the OM1–OM5 multimode fiber grades guide to identify what is on the reel.
Fiber Splicing Tools and Safety: What to Prepare Before You Start
Both methods share the same preparation tools. Assemble these before you open the cable:
- Cable stripper or ripcord — opens the outer jacket and buffer tubes without nicking the fibers inside.
- Precision fiber stripper — removes the 250 µm acrylate coating to expose the bare 125 µm glass. Use the correct hole size; a dull or wrong-size blade leaves nicks that break under the arc or in the splice housing.
- Cleaver — produces the flat, 90-degree end face that both splice methods depend on. A poor cleave is the single most common cause of high loss.
- Lint-free wipes and 99% isopropyl alcohol — every step that exposes fiber gets cleaned before the next step.
- Fusion splicer (for fusion) — with either core-alignment or cladding-alignment optics. Core alignment costs more and matters for single-mode and low-loss budgets.
- Splice sleeves and heat oven (for fusion) — the protection that keeps a good splice from breaking later.
- Mechanical splice housings (for mechanical) — pre-filled or refillable housings with index-matching gel.
- OTDR or OLTS — the verification tool you use after splicing to confirm the loss is within budget.
Safety is not a sidebar here. Stripped fiber ends are glass splinters: they lodge in skin and eyes, and they are nearly invisible. Wear safety glasses, keep your workspace away from food and drink, and dispose of fiber offcuts in a sealed sharps container. Treat every fiber as a live optical source — never look into a fiber end, because the laser output can damage your eye even when it seems dim. Fusion splicers generate an electric arc and can ignite fumes, so clear flammable materials from the work area. Wiring and cable-handling practices in the US fall under OSHA's electrical standards; in other regions, follow your local code and your employer's procedures.
How to Fusion Splice Fiber Optic Cable: Step by Step
Fusion splicing fuses two cleaved fiber ends into one continuous glass path. Work in a clean, dry area — dust and humidity are the enemies of a low-loss splice. You will need a fusion splicer, cleaver, strippers, wipes, alcohol, splice sleeves, and the heat oven.
- Open the cable and expose the fibers. Strip the outer jacket and strength members, then the buffer tube, using the cable stripper or ripcord. Work fiber by fiber; keep the remaining fibers bundled so they do not tangle. If the cable has 12 or more color-coded fibers, the fiber optic color code tells you which fiber is which before you cut.
- Strip the coating. Slide the precision stripper over the fiber and remove about 2–5 cm of the 250 µm acrylate coating, exposing the bare 125 µm cladding. Pull smoothly and straight — a bent or nicked fiber will fail at the splice.
- Clean the bare fiber. Wipe the stripped section with a lint-free wipe moistened with 99% isopropyl alcohol. Check it under the splicer's microscope if you have one; any residue will show up as loss later.
- Cleave the fiber. Clamp the fiber in the cleaver and make a single clean cut to the length your splicer specifies (typically 10–16 mm of bare fiber for single-mode). Inspect the end: it should look like a perfect flat mirror. A chip, lip, or angled end means cleave again — never fuse a bad cleave and hope.
- Load the fibers into the splicer. Open the wind protector, place one fiber in each V-groove with the cleaved ends meeting at the arc center, and close the lid. The splicer aligns the cores, measures the end faces, and estimates the loss on its display.
- Fuse. Press the splice button. The machine fires a pre-fusion arc to burn off contamination, then the main arc melts and fuses the ends. The whole cycle takes seconds.
- Read the estimated loss. A good single-mode fusion splice reads 0.02–0.05 dB; anything above 0.1 dB should be redone immediately — open the holder, re-cleave, and try again. This is where the machine's estimate and your own judgment both matter: if the reading is bad, do not ship it.
- Protect the splice. Center a splice sleeve over the fused area and shrink it with the heat oven (or clamp a mechanical sleeve). Store the protected splice in the splice tray, coiling slack with a radius well above the cable's minimum bend radius.
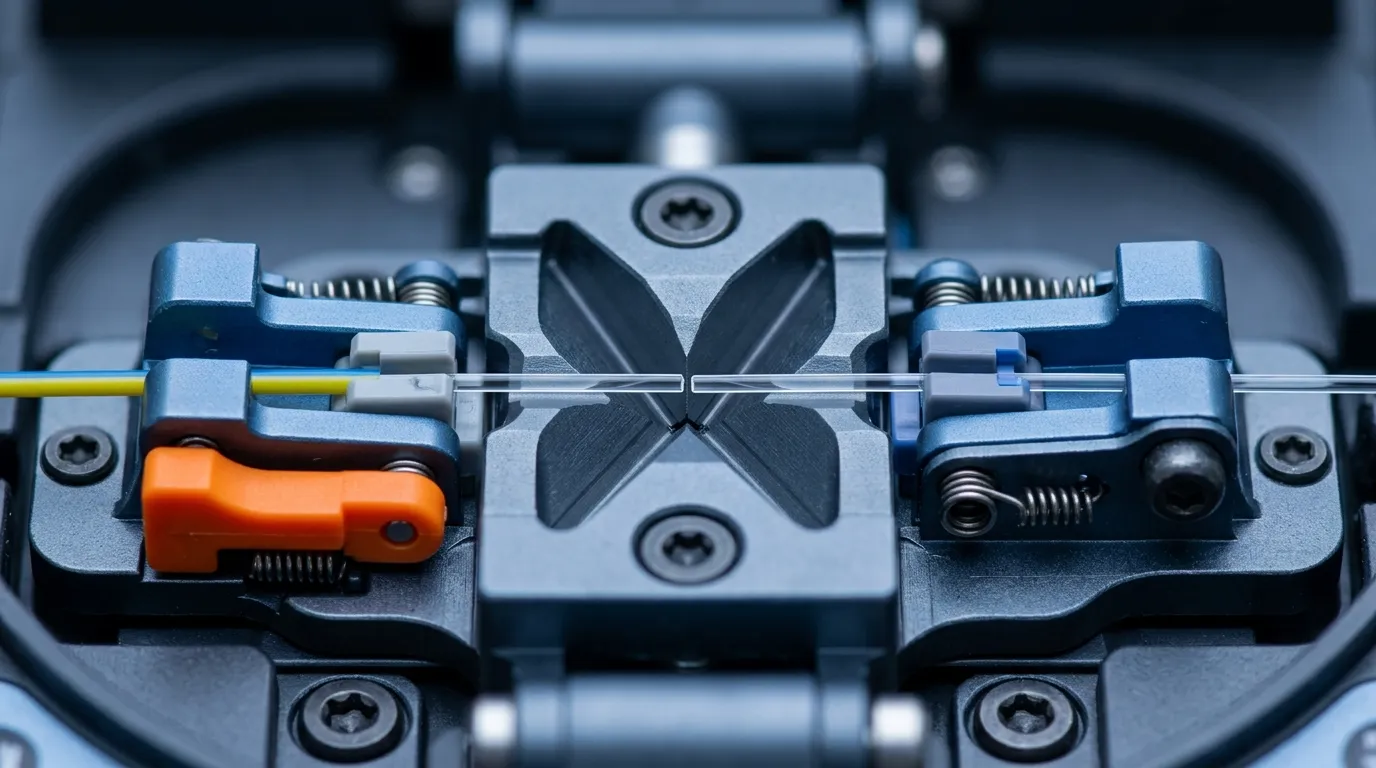
When the fusion arc burns uneven or loss readings drift upward over the day, stop and recalibrate: dirty electrodes are the usual culprit, and most splicers have an arc-calibration routine you can run in the field. A splicer that is out of calibration will quietly turn good cleaves into bad splices.
On ribbon cable — 4 to 12 fibers side by side in one flat ribbon — the same sequence applies at higher speed: a ribbon cleaver prepares every fiber in one pass, and a mass fusion splicer aligns and fuses the whole ribbon under a single arc. The loss targets are the same per fiber; only the tooling changes.
How to Make a Mechanical Splice: Step by Step
Mechanical splicing joins two fibers inside a small housing that holds the ends in alignment with index-matching gel bridging the gap. It needs no power and no expensive machine, which makes it the standard answer for emergency restores and short indoor runs. The preparation is the same as fusion — strip, clean, cleave — and it is just as unforgiving about cleanliness.
- Prepare the fiber ends. Strip the jacket and coating, clean with alcohol and lint-free wipes, and cleave both fibers to a flat 90-degree end, exactly as in the fusion procedure. For mechanical splices, cleave quality is everything: the housing does not correct a bad end face.
- Open the splice housing. Most mechanical splice housings are pre-filled with index-matching gel and close with a latch or crimp. If yours is refillable, apply a small drop of gel to the V-groove now.
- Insert the first fiber. Push the prepared end into the housing from one side until it reaches the alignment point — you will feel or see it seat in the V-groove. Do not force it; the fiber is thin enough to buckle.
- Insert the second fiber. Push the other end in from the opposite side until the two ends meet at the center of the housing. The gel should visibly fill the gap between them.
- Lock the housing. Close the latch or crimp the metal sleeve to fix both fibers in place. A loose housing moves under vibration and the loss climbs.
- Check the fiber path. Confirm neither fiber is bent sharply at the housing exit. If the cable strain is pulling on the housing, secure the cable before you finish.
- Verify the loss. A mechanical splice should measure 0.2–0.5 dB (check the housing manufacturer's spec). If it reads above that, open it, re-cleave both ends, and redo it — mechanical splices are cheap enough to redo on the spot.
- Protect the splice. Place the closed housing in the splice tray or wrap it in the provided mechanical sleeve. No heat is needed, but the housing must not hang unsupported in the splice closure.
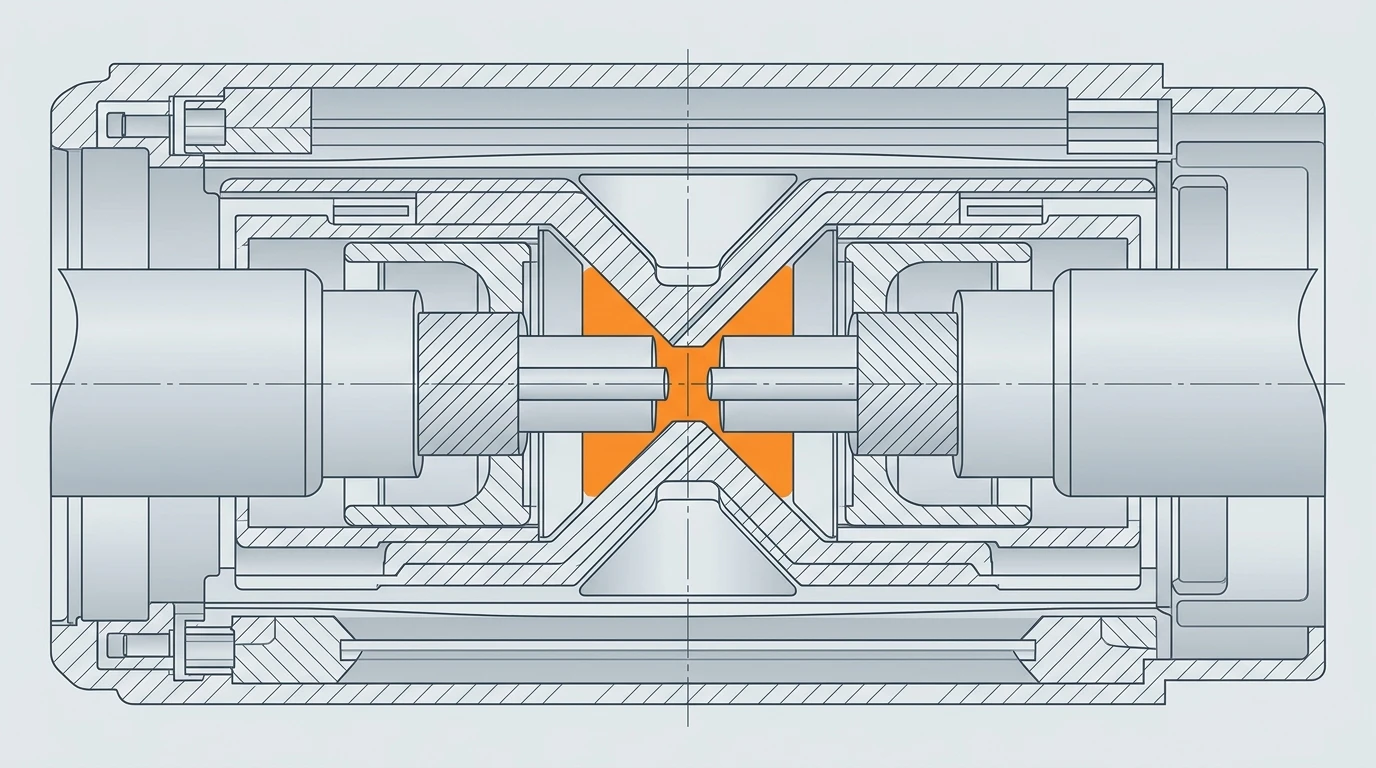
Mechanical splices are semi-permanent by design: the index-matching gel dries and shifts over years, so loss drifts upward. Plan for that when you choose the method — a mechanical splice in a permanent backbone is a maintenance ticket waiting to be written.
Splice Loss: What's Acceptable and How to Verify It
Splice loss is the number that decides whether your work is done. Fusion splices should land at 0.02–0.05 dB and anything above 0.1 dB is a redo. Mechanical splices run 0.2–0.5 dB depending on the housing; above 0.5 dB is a redo. Those are working field numbers — your network's loss budget, not habit, is the final authority, and the budget for a long link can be stricter than the per-splice rule.
Method | Typical loss | Acceptable max | Redo above |
|---|---|---|---|
Fusion (single-mode) | 0.02–0.05 dB | 0.1 dB | 0.1 dB |
Fusion (multimode) | 0.05–0.1 dB | 0.2 dB | 0.2 dB |
Mechanical | 0.2–0.5 dB | 0.5 dB | 0.5 dB |
Verification means measuring, not assuming. Two tools do the job:
- OLTS (optical loss test set) — measures total end-to-end loss of a link; simple and sufficient when you only need a pass/fail on the whole run.
- OTDR (optical time-domain reflectometer) — shows loss at each individual splice along the fiber. This is the tool that tells you which splice is bad, and it is the one to use when a link fails and you have several splices in it.
One trap: OTDR readings depend on direction. A single-direction OTDR measurement can understate a splice's true loss because of how backscatter averages around the joint. When a splice is marginal, measure it from both ends and take the average. A good fusion splice also reflects almost nothing — the trace stays flat across the joint instead of showing a reflectance spike, which is how you recognize a clean fusion splice (high return loss) on the trace. The trace should show a clean, small step at each splice location — a large step, a rising slope, or a bump means the splice is bad, the fiber is bent, or the protection sleeve is not seated properly.
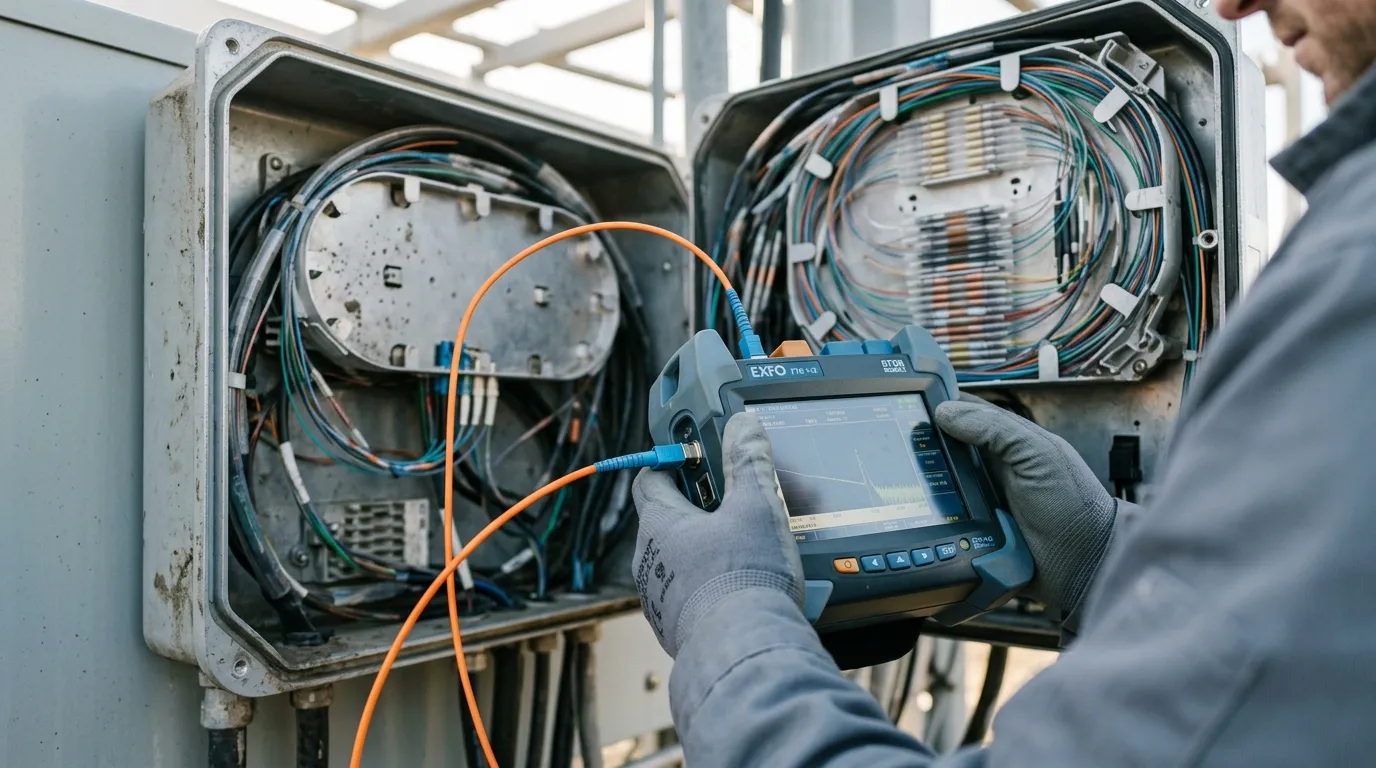
If you are working to a written spec (carrier, customer, or internal), log every splice's measured loss with the fiber number and location. That log is what lets you find a drifting joint months later without re-measuring the whole cable.
Common Splicing Mistakes and How to Fix High Loss
High splice loss is almost never mysterious. When a splice reads bad, walk this list in order:
- Bad cleave. A chipped, lipped, or angled end face is the number-one cause of high loss in both methods. Re-cleave and inspect the end before fusing or inserting. If cleaves keep coming out bad, the cleaver blade is dull or the clamping pressure is wrong — rotate or replace the blade.
- Contamination. Dust, oil, or coating residue on the fiber end burns into the splice in fusion or blocks the gel contact in mechanical. Re-clean with fresh alcohol and a clean wipe — never reuse a wipe.
- Coating residue or nicks from stripping. If the stripper blade is dull or the hole size is wrong, it leaves coating fragments or micro-cracks on the glass. Strip again with a clean, correctly sized blade and inspect the stripped section.
- Fusion splicer drift. Rising loss across the day, or the same fiber spliced twice giving different readings, points at dirty electrodes or stale arc parameters. Run the arc-calibration routine and clean the electrodes per the manual.
- Protection problems. A sleeve that is not centered over the splice leaves bare fiber exposed to bending; a sleeve clamped over a kinked fiber makes the loss worse than no sleeve at all. Re-protect and re-store the splice in the tray with generous slack.
Two more situations show up in the field. Splicing single-mode to multimode — it can be done, but the mode-field mismatch produces loss that no procedure fixes; replace one end with matching fiber instead. And humidity: a wet or high-humidity splice day degrades both the cleave surface and the fusion arc, so dry the work area before you start and keep opened gel housings capped.
No Fusion Splicer? Fast Connectors and Pre-Terminated Cable as Alternatives
You have two ways to finish a fiber without fusing it, and both are legitimate depending on the job.
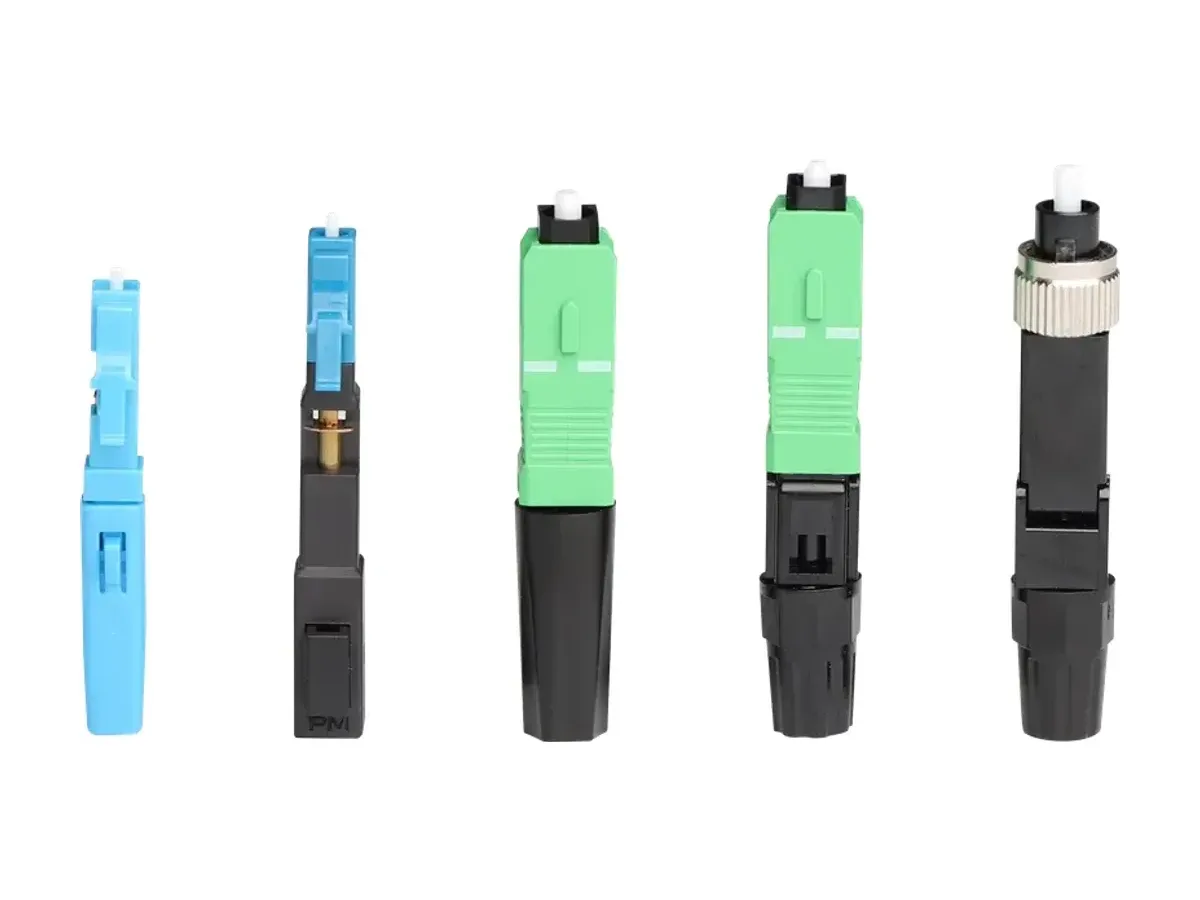
Fast connectors are field-installable connectors with a pre-polished fiber stub inside — you strip, cleave, and insert your fiber, and a mechanical splice inside the connector body makes the optical joint. They are the standard answer for FTTH terminations and quick repairs where a fusion splicer is not available. Loss is in the mechanical-splice range (0.2–0.5 dB), and the joint is not designed for repeated re-entry. If you are stocking a repair kit for an FTTH network, field-installable fast connectors in SC and LC formats cover most field terminations you will meet.
Pre-terminated cable moves the splice from the field to the factory. Cable lengths arrive with connectors already installed and tested, so the deployment crew only pulls, routes, and plugs — no stripping, no cleaving, no fusion, and no on-site loss variance. The trade-off is planning: you must order exact lengths, and the factory-terminated ends are not field-serviceable. For repeatable builds like MDU risers, data center links, or FTTH drop cable runs, pre-terminated cable assemblies routinely beat field splicing on install time and consistency.
The decision rule: splicing wins when the cable already exists in the ground or the wall; fast connectors win when you need a quick, tool-light termination; pre-terminated wins when you control the length before the job starts. Each of the three has a place — the mistake is using one as a substitute for the others without checking the loss and longevity requirements first.
FAQ
Can you splice single-mode fiber to multimode fiber? Technically yes, but the mode-field mismatch between the two core sizes makes the splice loss so high that the joint is useless for any real link. Replace one side with matching fiber instead of splicing a mismatch.
How long does a fiber optic splice last? A properly protected fusion splice is effectively permanent — 20-plus years in outside plant. Mechanical splices degrade as the index-matching gel ages and are best treated as temporary or indoor solutions with a planned service life.
Do I need a license to splice fiber optic cable? No license is required in most regions, but employers and customers typically require training or certification (such as CFOT) and you must follow applicable safety and wiring codes. Unlike connectors, which are built for repeated mating, a splice is a permanent joint — the difference is documented in the connector reference if you need the formal comparison.
What is the difference between splicing and connectors? A splice is a permanent, low-loss joint made in the cable run; a connector is a demountable interface for patch panels and equipment. Connectors have higher insertion loss and are meant to be plugged and unplugged; splices are meant to be made once. A pigtail — a short, factory-terminated fiber stub with a connector on one end — is the standard bridge between the two: you splice the bare end onto the cable and plug the connector end into the panel.
Can I splice fiber without a fusion splicer? Yes — mechanical splicing with a splice housing, or a fast connector for terminations, both work without a fusion splicer. You still need strippers, a cleaver, and cleaning supplies; loss will be higher than fusion (0.2–0.5 dB range).
What is acceptable fiber splice loss? Fusion splices should measure 0.02–0.05 dB typical and are redone above 0.1 dB; mechanical splices run 0.2–0.5 dB and are redone above 0.5 dB. Always confirm against your link's loss budget, which can be stricter for long runs.
Plan the Splice Out of the Job Where You Can
Every field splice is a future maintenance point, so the best splicing advice is to splice less. When you are planning a rollout, count the splices per route and ask whether each one is avoidable: pre-terminated assemblies eliminate most of them, fast connectors handle the tool-light terminations, and fusion covers the splices that genuinely must be made in the field. Manufacturers who build the cable, the connectors, and the assemblies in one factory — like DYS Fiber Optic, which makes fast connectors, pre-terminated cable, and the drop cable between them — make it practical to cut your field splice count without changing your loss budget. If you are evaluating pre-terminated or OEM options for your next rollout, send your specs to DYS and compare the quoted loss data against the numbers in this guide. For the rest of the installation and testing workflow — cable pulling, termination, and certification — our fiber optic installation and testing hub collects the full field handbook as it grows.